Introduction to the NID DAT Studio Test
The National Institute of Design (NID) Design Aptitude Test (DAT) is a two-tier process. While the Prelims evaluate your observation and visualization on paper, the Studio Test or Phase 2 is where your hands-on skills come to life. This phase focuses on your ability to manipulate materials, solve problems in three dimensions, and demonstrate creative agility. Mastering the Studio Test requires more than just artistic talent; it demands a deep understanding of material properties and structural integrity. In this guide, we will explore the nuances of material handling and provide actionable 3D modeling tips to help you excel in the latest pattern of the exam.
The Core of Material Handling
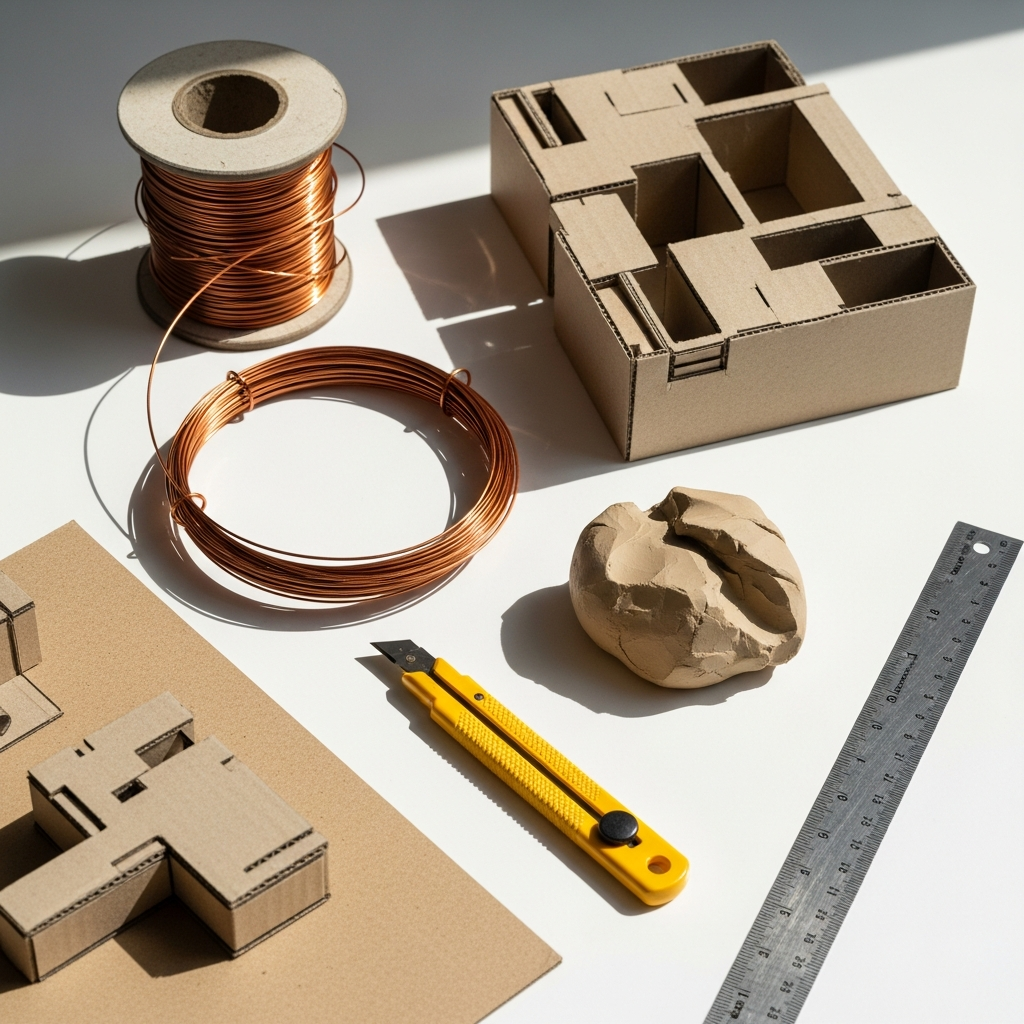
Material handling is the essence of the NID Studio Test. Candidates are often provided with a kit containing diverse materials like cardboard, wire, clay, foam, and even unconventional items like straws or cloth. The goal is to create a model that is not only aesthetically pleasing but also structurally sound and conceptually relevant. The examiners look for how well you understand the limitations and strengths of each material. For instance, can you make a flexible wire hold a heavy object? Can you transform a flat sheet of cardboard into a curved, organic form?
Understanding Your Toolkit
- Cardboard and Paper: These are staples for building structural frames. Learning techniques like scoring (making a shallow cut to fold neatly) and slotting (cutting slits to join pieces without glue) is crucial.
- Wire: Often used for creating skeletons or ‘armatures.’ It is excellent for representing line and movement in a 3D space.
- Modeling Clay: Perfect for organic shapes and adding weight or texture to a model. However, be wary of its weight, which can collapse a flimsy structure.
- Mount Board: Thicker than paper, it provides better support but requires precision cutting with a cutter rather than scissors.
Strategic 3D Modeling Tips
Creating a 3D model under time pressure is a daunting task. To succeed, you must move from a 2D thought process to a 3D execution. Start by sketching a rough thumbnail of your idea. This helps in visualizing the volume and the amount of material required. Always prioritize stability; a beautiful model that falls over will not score high marks. Focus on joinery—how different parts of your model connect. Using too much adhesive can look messy, so try to use mechanical joins like tabs, slots, or interlocking parts wherever possible.
Comparative Analysis of Common Studio Test Materials
To help you choose the right material for the right purpose, refer to the table below which highlights the properties of common materials provided during the latest pattern exams.
| Material | Primary Strength | Difficulty Level | Best Used For |
|---|---|---|---|
| Corrugated Cardboard | Structural Integrity | Medium | Building bases and rigid walls |
| GI Wire | Flexibility and Line | High | Creating dynamic outlines or skeletons |
| Terracotta Clay | Malleability | Low | Organic forms and textural details |
| Paper Strips | Lightweight and Versatile | Low | Creating volume through weaving or quilling |
| Foam Board | Clean Finish | Medium | Architectural models and sharp edges |
Optimizing Your Performance with Mock Tests
Preparation is the key to overcoming the anxiety associated with the Studio Test. One of the most effective ways to prepare is by simulating the actual exam environment. This includes working with a limited set of materials and a strict timer. At myentrance.in, we provide specialized mock tests and resources designed specifically for the NID DAT Studio Test. These mock tests challenge you with the latest pattern prompts, helping you refine your material handling speed and 3D visualization skills before you step into the actual exam hall.
The Importance of the Design Write-up
Most Studio Test tasks require a brief write-up explaining your concept. This is not just a description of what you made, but an explanation of ‘why’ you made it. Mention the problem you were solving, the inspiration behind your form, and why you chose specific materials. A well-articulated write-up can significantly boost your score by showing the examiners your design thinking process.
Final Tips for Success
- Keep your workstation clean: A cluttered space leads to a cluttered mind. Organise your materials before you start.
- Manage your time: Allocate 10% for ideation, 80% for construction, and 10% for the final finish and write-up.
- Be Resourceful: If you run out of glue, find other ways to join materials. Resourcefulness is a key trait NID looks for.
- Safety First: Handle cutters and wires carefully. An injury during the exam can hamper your performance.
Frequently Asked Questions (FAQ)
What is the primary objective of the NID Studio Test?
The primary objective is to test a candidate’s hands-on skills, creativity, and ability to translate a conceptual idea into a physical 3D form using various materials.
Can I bring my own tools to the NID Studio Test?
Usually, NID provides a basic set of tools. However, candidates are often allowed to bring items like a steel ruler, pencils, cutters, and scissors. Always check the latest admit card instructions for specific guidelines.
How important is the final finish of the model?
While the concept and structural integrity are vital, a clean finish shows attention to detail and craftsmanship, which are highly valued in the design field.
How can I improve my material handling skills at home?
Practice by picking up everyday objects like newspapers, old cartons, and strings, and try to build stable structures or thematic models within a 30-minute timeframe. Utilizing mock tests from myentrance.in can also provide professional-level guidance.
Is 3D modeling the only part of the Studio Test?
No, the Studio Test may also include sensory tests, sketching rounds, or group discussions, though 3D modeling remains a significant component of the evaluation.
