The Situation Test Challenge: High-Fashion Futurism
The Situation Test is the final hurdle in your journey to NIFT, designed to test your ability to translate abstract concepts into three-dimensional realities. In this masterclass, we explore one of the most prestigious and challenging themes: Developing futuristic headgear for a high-fashion runway. As an elite panelist, I have seen thousands of models; what separates a top-ranker from the rest is not just the ability to stick paper together, but the ability to engineer a structure that defies gravity while telling a compelling story. Futurism in fashion isn’t just about silver foil and jagged edges; it is about exploring the intersection of human anatomy, technology, and visionary aesthetics. When you are handed a bundle of wire, some cardstock, and a few miscellaneous items, the jury is looking for your ability to handle tension, balance, and negative space.
What the Jury is Secretly Looking For (Evaluation Criteria)
In the evaluation room, we don’t just look at the final model; we look at the evidence of your design process. Here are the five pillars we use to score your performance:
- Creative Innovation: Have you moved beyond the cliché? A simple crown or a helmet is predictable. We look for ‘Avant-Garde’ interpretations that challenge the traditional silhouette of headwear.
- Material Manipulation: How have you treated the wire? Is it just a support, or is it an aesthetic element? We value students who can bend, twist, and weave materials to create new textures.
- Structural Integrity and Balance: This is crucial for headgear. If your model cannot stand upright on its own or looks like it would fall off a model’s head, you lose marks. Balance is both physical and visual.
- Aesthetic Appeal: The high-fashion runway demands a certain level of sophistication. Your model should have a ‘finished’ look, with no visible glue marks or messy joints.
- The Concept Note: This is your voice. If you cannot articulate why your design is ‘futuristic,’ the model loses its soul. We look for technical terminology and emotional depth in your writing.
💡 Pro-Tip: The ‘360-Degree’ Rule
Always design for 360 degrees. Most students focus only on the front. On a runway, the audience sees the model from the side and back. Ensure your wire structures wrap around the head elegantly, creating interesting shadows from every angle.
Material Handling: The Art of Wire Manipulation
Wire is the ‘skeleton’ of your design. In the latest NIFT tests, wire has become a staple because it tests a student’s dexterity. Here is how to master it:
1. Understanding Gauge and Tension
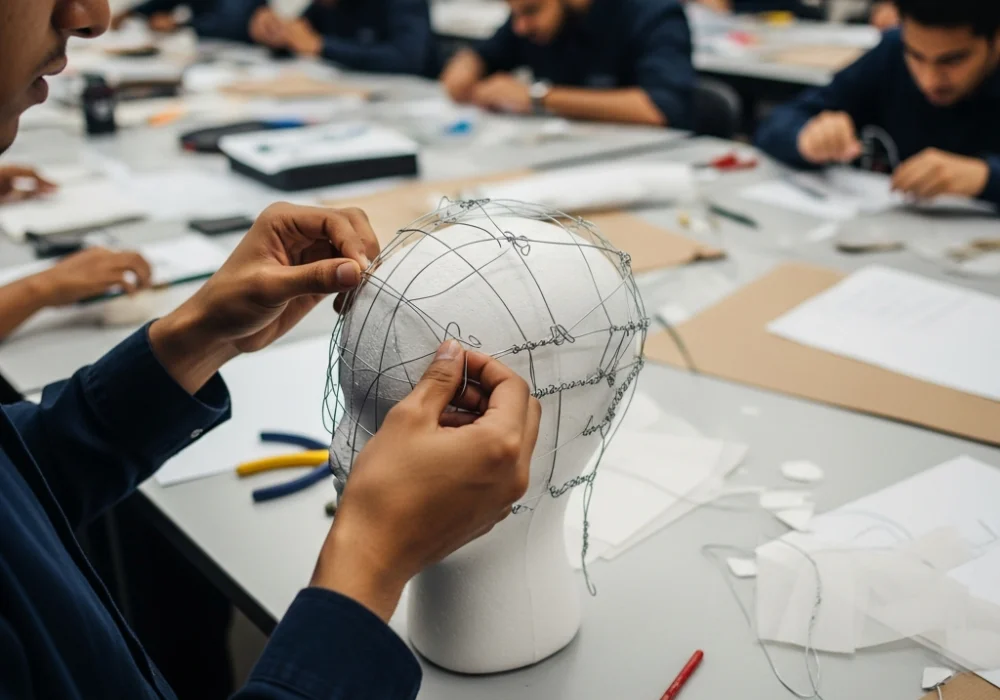
You will likely receive Galvanized Iron (GI) wire or thin copper wire. GI wire is stiff and holds shape well, making it perfect for the main ‘chassis’ of the headgear. Thin wire is better for detailing and binding. Always use your hands to ‘warm’ the wire by pulling it through your fingers; this makes it straighter and easier to manipulate.
2. Creating Secure Joints without Tape
Visible tape on wire is a sign of an amateur. Instead, use ‘binding’ techniques. Wrap a thinner wire tightly around the junction of two thicker wires. If binding isn’t an option, use a tiny, neat drop of all-fix or glue-gun, but hide it under a decorative element like a bead or a paper fold. Creating a ‘hook-and-loop’ joint is another professional way to connect wire ends.
3. Creating Volume with Negative Space
Wire allows you to create massive structures that are lightweight. Instead of filling space with solid paper, use wire to create ‘cages’ or ‘orbitals.’ This adds to the futuristic, holographic aesthetic of high fashion.
Step-by-Step Strategy: Building the Futuristic Headgear
Follow this systematic approach to ensure you finish your model within the 3-hour limit:
Phase 1: The Foundation (20 Minutes)
Before you build the ‘fantasy,’ you must build the ‘fit.’ Create a circular base (a headband or a skull-cap structure) using wire or a thick strip of cardstock. This must sit stably on a flat surface, simulating the human head. If this base is shaky, your entire design will fail.
Phase 2: The Structural Skeleton (40 Minutes)
Define the ‘Futuristic’ silhouette. Are you going for ‘Alien-Organic’ with curved, flowing wires? Or ‘Cyber-Geometric’ with sharp angles and triangular planes? Build the main vertical and horizontal supports. Ensure the weight is distributed evenly; if the design is heavy on the right, balance it with a counter-extension on the left.
Phase 3: Skinning and Detailing (60 Minutes)
Now, add ‘skin’ to your skeleton. Use materials like translucent butter paper, metallic sheets, or even plastic straws to create texture. For a futuristic look, try ‘origami tessellations’—repeated folded patterns that look like solar panels or futuristic armor. Interweave these through your wire structure.
Phase 4: Finishing Touches (30 Minutes)
Clean up. Remove ‘spider webs’ left by the glue gun. Ensure all wire ends are tucked away so they don’t look hazardous. Add a focal point—perhaps a central ‘sensor’ or a ‘visor’ element that pulls the whole design together.
💡 Pro-Tip: Thinking in 4D
Can a part of your headgear move? Use wire as a hinge. A visor that flips up or antennae that vibrate when the model walks adds a ‘wow’ factor that almost guarantees a top score in the Situation Test.
Articulating the Aesthetic: The Concept Note
Your model is 50% of the work; the note is the other 50%. It tells the jury that your design was intentional, not accidental. For a futuristic theme, focus on these keywords: Aerodynamics, Biomorphism, Cyber-Physical, Kinetic, and Minimalism.
Structure of a Winning Note:
- Title of the Work: Give it a sophisticated name (e.g., ‘The Neural Nexus’ or ‘Aero-Shell v.1’).
- The Inspiration: Explain what ‘futuristic’ means to you. Is it a world where humans merge with machines? Or a future where we return to nature (Bio-futurism)?
- Material Rationale: Explain why you used wire. ‘Wire was utilized to represent the flow of data streams and to provide a lightweight structural integrity, echoing the efficiency of future aerospace engineering.’
- Design Elements: Mention the use of line, rhythm, and balance. ‘The asymmetrical wire extensions provide a sense of movement, even when stationary.’
“Design is not just what it looks like and feels like. Design is how it works.” — This quote should guide your engineering of the headgear.
Common Pitfalls to Avoid
Even the most creative students often falter on these minor details. Be mindful of:
- Over-decoration: Do not use every material in the box. A ‘futuristic’ look is often ruined by adding too many colorful bits or messy glitter. Stick to a sophisticated color palette.
- Ignoring the Brief: If the brief says ‘High-Fashion Runway,’ do not make a literal robot mask. It must look like something a designer like Iris van Herpen or Alexander McQueen would produce.
- Time Management: Many students spend 2 hours on the wire and have no time for the ‘skin’ or the note. Follow the phases mentioned above strictly.
💡 Quiz: Test Your Strategy
Question: If your wire structure feels top-heavy, what is the best solution?
Answer: Do not just add more glue. Instead, extend the base downwards or add a counter-weight element at the back of the head structure to shift the center of gravity. This shows the jury you understand physics and design engineering.
Ready to Ace Your NIFT Situation Test?
Preparing for the Situation Test requires hands-on practice and expert feedback. Don’t leave your design career to chance. Join our intensive workshops and mock tests at MyEntrance to perfect your material handling skills!
💬 Chat with our Experts on WhatsApp (+91 9526806124)